Connect an AI agent
An AI agent can list, upload and tidy your media for you. This guide shows how to give it access with a token, how much to let it do, and how to take that access away again.
For everyone with an account, on every plan.
The pictures show a phone. On a computer the pages look the same, only wider.
On this page
What it does
- Apps like Claude Code, Codex, Cursor and Gemini CLI can connect to your account through MCP, a standard way for AI agents to use other services.
- Once connected, you can ask the agent in plain words, for example to move your holiday photos into a new folder or to add titles and descriptions to your files.
- The agent gets in with a token: a long secret code you create. Anyone who has it can do in your account whatever its access level allows, so keep it private, like a password.
Create a token
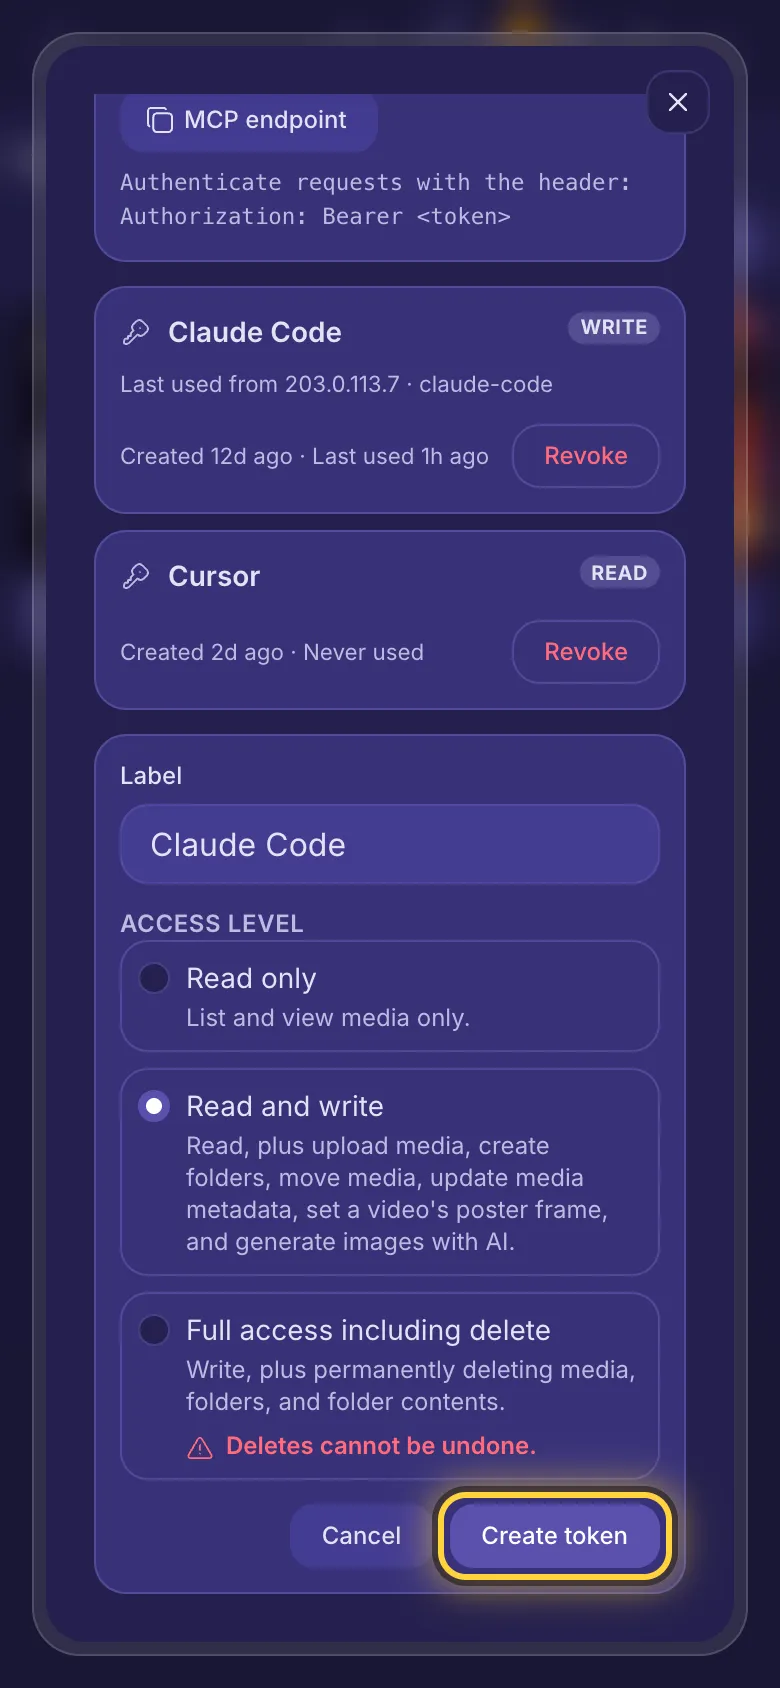
- Tap the robot button at the top of the page (Connected agents).
- Tap New token.
- Under Label, type a name you will recognize later, such as the app's name.
- Pick an Access level (more on that below), then tap Create token.
Hand it to your agent
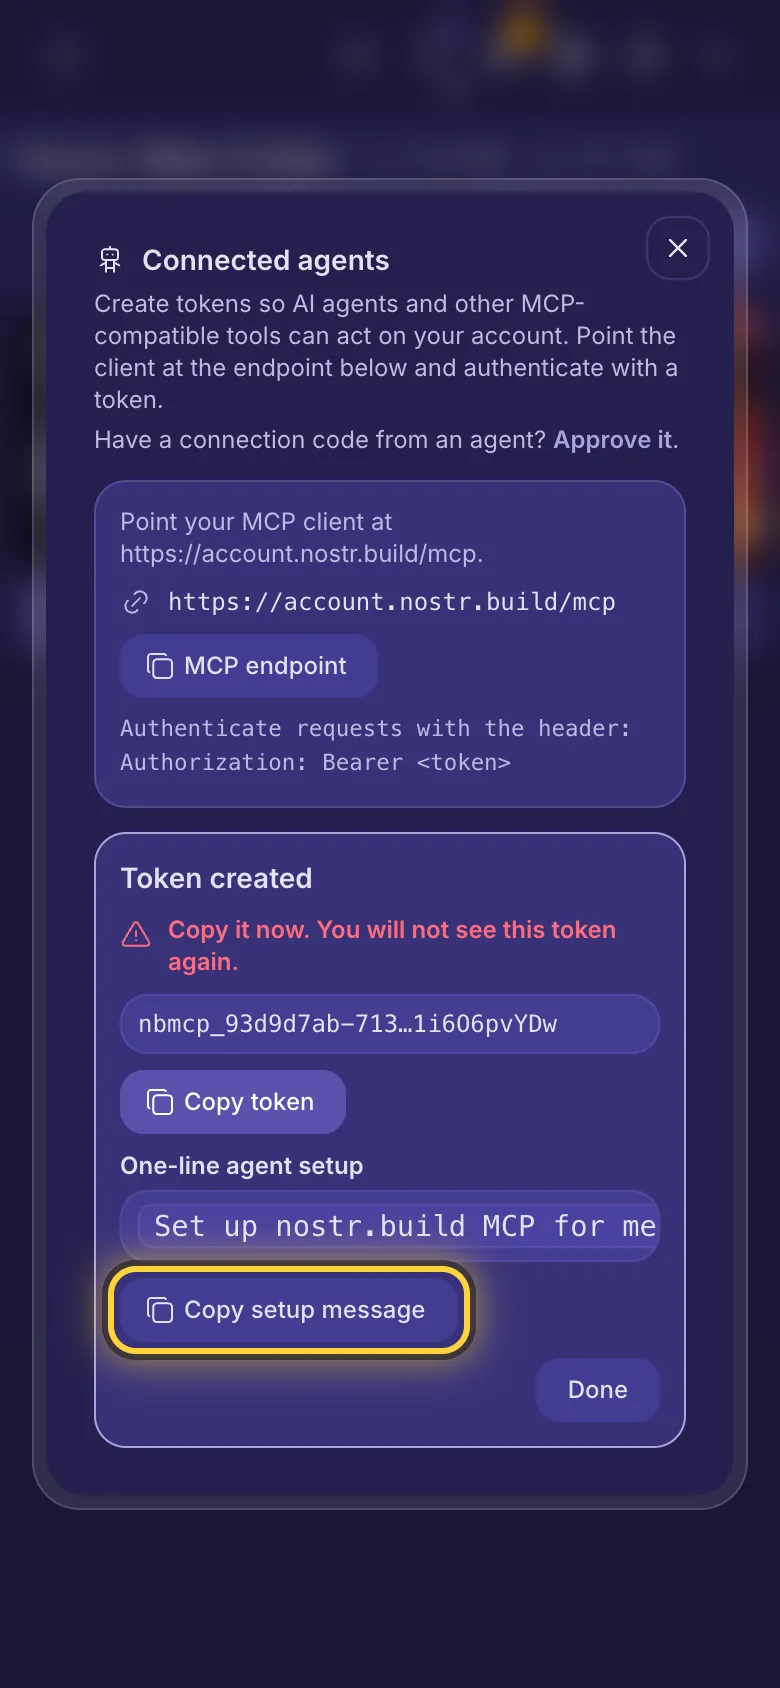
- You now see Token created. Tap Copy setup message.
- Paste the message into a chat with your agent and send it. An agent that can run commands, such as Claude Code or Codex, reads our setup page and adds the connection itself. Some need a restart before they can use it.
- Tap Done once the agent is connected.
Setting an app up by hand? Tap MCP endpoint to copy the address, and give the app the token with Copy token. Settings for Claude Code, Codex, Cursor, Gemini CLI and more are on account.nostr.build/agent-setup.md (in English).
Or approve a connection code
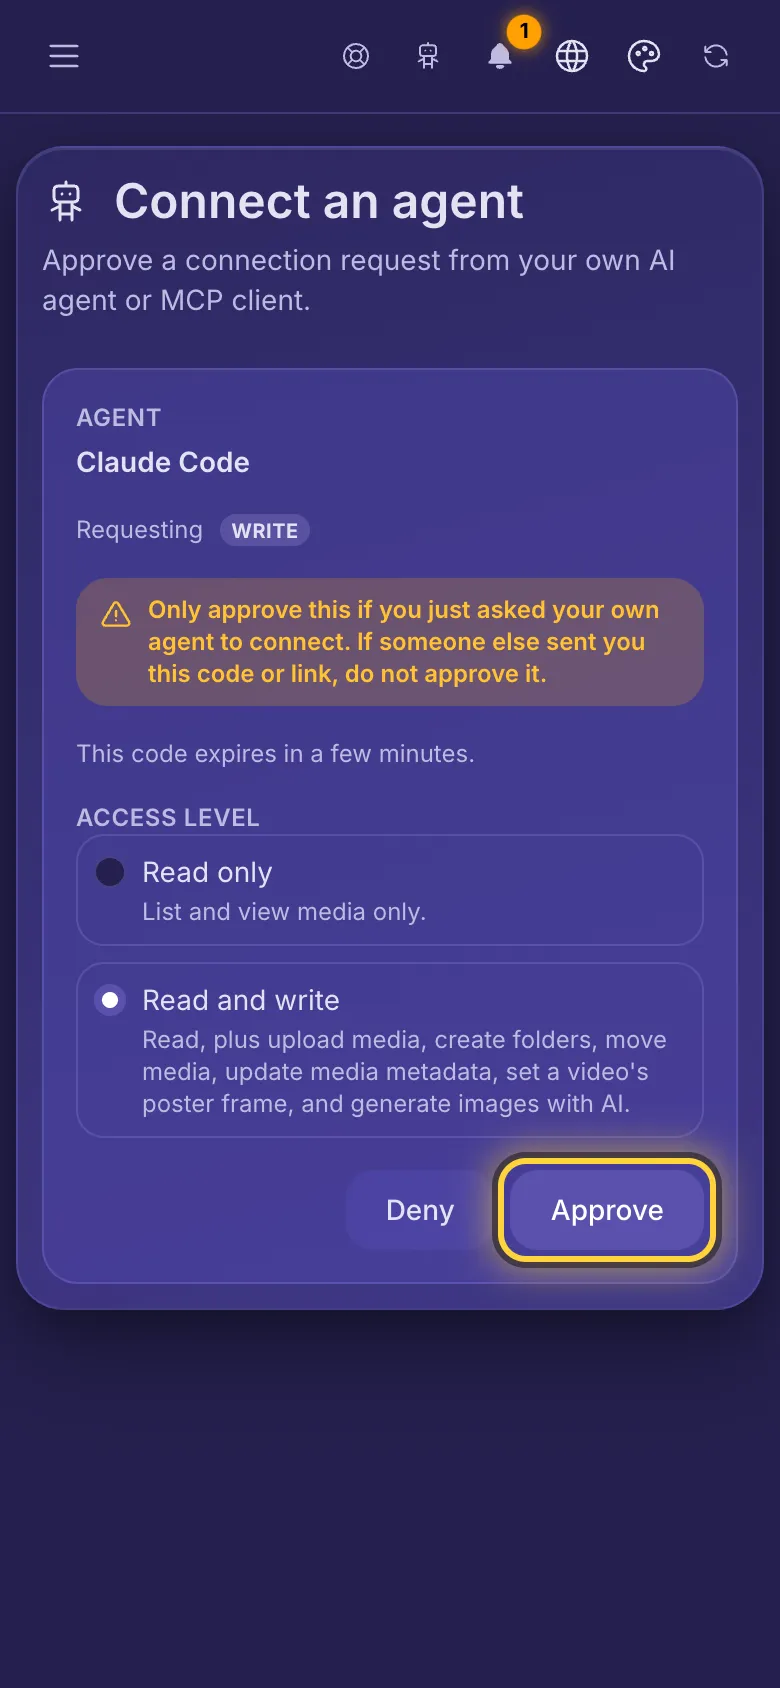
Some agents ask to connect on their own. The agent shows you a short code (like ABCD-2345) and a link.
- Sign in first, then open the link: the code is filled in for you. Or in Connected agents, tap Approve it and type the code under Connection code. Then tap Continue.
- Check the agent's name and the access it asks for. You can give it less, never more.
- Tap Approve. The agent gets its token by itself; you never see it. It then shows up in Connected agents.
Pick the right access level
- Read only: the agent can look at your folders, files, account and notifications, and change nothing.
- Read and write: it can also upload, make folders, move files, edit titles and descriptions, and set a video's cover picture. On plans with AI Studio it can also make AI images, and the paid models use your AI credits.
- Full access including delete: it can also delete files and folders. Deleting a folder moves its files to Home, but the agent can also delete a folder together with everything in it. Deleted files can't be brought back.
See and revoke tokens
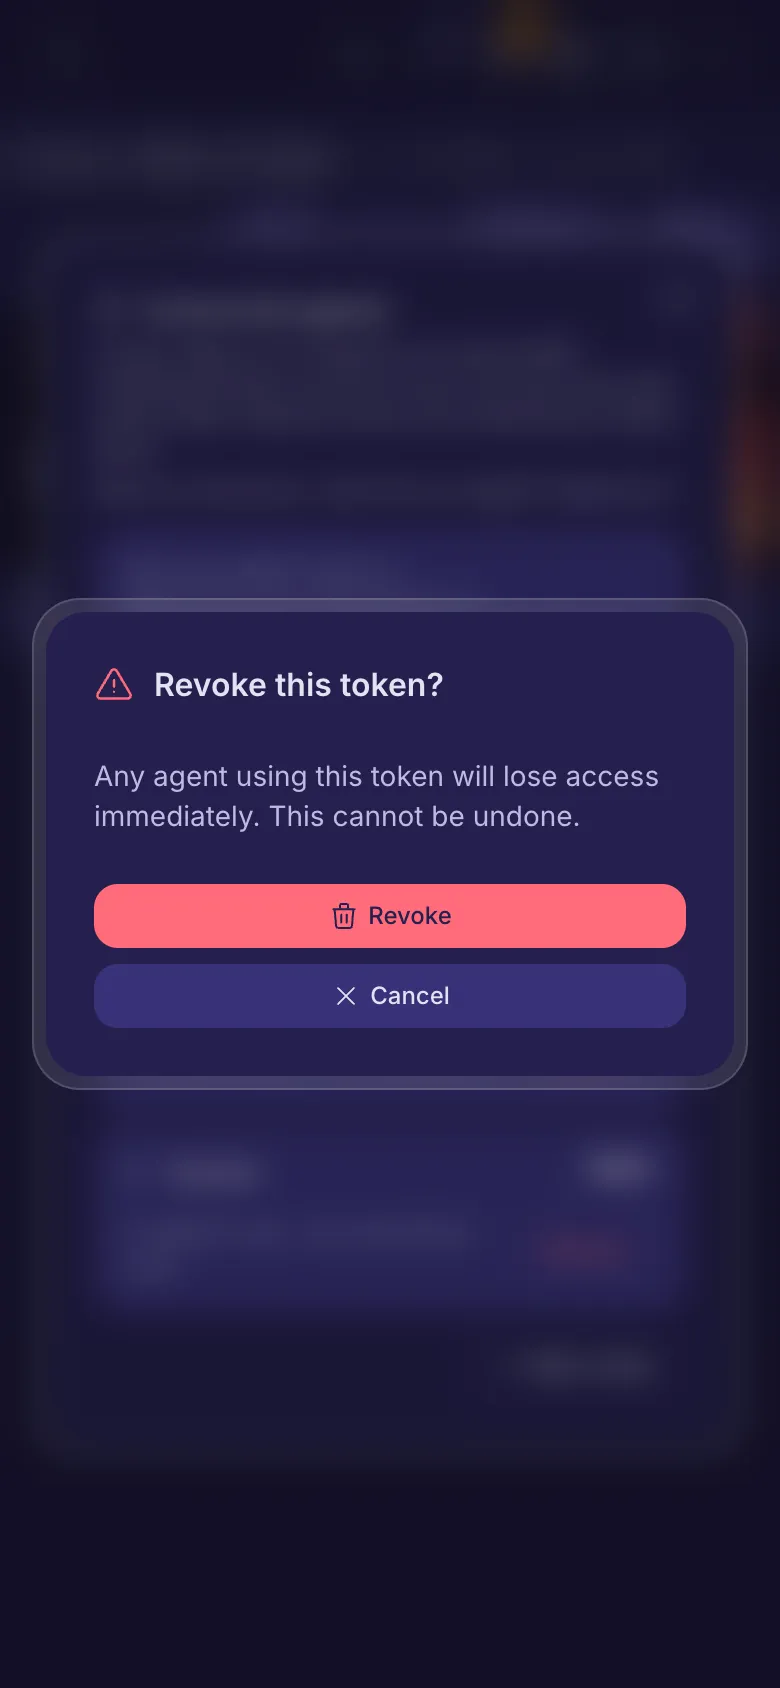
- Open Connected agents. Each token shows its name, its access level, when it was made, and when it was last used, with the IP address and app it came from (Never used if not yet). This updates at most once an hour.
- Tap Revoke next to a token, then Revoke again to confirm. Any agent using it loses access at once. A folder deletion it already started still finishes.
Tokens don't run out on their own, so revoke the ones you no longer use. A token's name and access level can't be changed: create a new token and revoke the old one.
Still stuck? When something goes wrong explains the common error messages, and Get help shows how to reach the team.